.png)


.svg)
.svg)
.svg)


.png)
.png)

Launch Your First App on Kubernetes with Minikube and Lens
Written by:
Ashwini
Launch Your First App on Kubernetes with Minikube and Lens: A Fun Adventure!
Part 2 of the Kubernetes Adventure Series
Welcome to Part 2 of our Kubernetes adventure! If you joined us in Part 1, you now understand the magic behind Kubernetes — the conductor orchestrating your containers. Now, it’s time to build your own stage and launch your first app!
In this guide, we’ll deploy a friendly Node.js application on Kubernetes using Minikube, your local Kubernetes playground, and explore it visually using Lens. Along the way, we’ll dive into key concepts like Networking, Volumes, ConfigMaps, and Secrets — and you’ll get your app running at http://webapp.local!
Imagine you’re the conductor of a grand orchestra, where every musician (container) plays perfectly in sync to deliver a stunning performance (your app). That’s Kubernetes! It orchestrates containers to ensure they work together seamlessly. In this exciting journey, we’ll deploy a simple Node.js app on Minikube, Kubernetes’ local playground, and use Lens to peek behind the curtain of our cluster. We’ll explore Networking, Volumes, ConfigMaps, and Secrets to make our app sing at http://webapp.local. Ready to conduct your first Kubernetes masterpiece? Let’s dive in!
Why This Matters
Kubernetes powers modern cloud apps, from Netflix to Pokémon GO. Minikube lets you experiment locally, and Lens gives you a visual dashboard to see your cluster in action. By the end, you’ll have a running app, a cool setup, and a story to share with your tech friends!
What You’ll Need
- Minikube: brew install minikube (macOS) or equivalent.
- Docker: Docker Desktop, your container workshop.
- kubectl: brew install kubectl, Kubernetes’ command wand.
- Lens: Download from k8slens.dev for cluster visuals.
- Node.js: Version 16+.
- A curious mind!
Step 1: Craft Your Node.js App
Let’s build a simple Express app that greets users and logs messages. Think of it as a friendly robot writing postcards to a log file.
1. Set Up the Project:
mkdir k8s-demo && cd k8s-demo
npm init -y
npm install express
2. Create server.js: This app responds with a greeting, pulls configuration from environment variables, and logs to a file.
const express = require('express');

// Create app
const app = express();
const port = process.env.PORT || 3000;

app.get('/', (req, res) => {
  const configValue = process.env.APP_CONFIG || 'Not configured';
  const secretValue = process.env.APP_SECRET || 'No secret provided';

  // ✅ Construct safe message for users
  const userMessage = 'Hello, Kubernetes! Configuration and secrets loaded successfully.';

  // ✅ Log actual config/secret to stdout (Kubernetes logs)
  const timestamp = new Date().toISOString();
  const logEntry = `${timestamp} - Config: ${configValue}, Secret: ${secretValue}`;
  console.log(logEntry);

  // ✅ Respond with safe message
  res.send(userMessage);
});

app.listen(port, () => {
  console.log(`Server running on port ${port}`);
});
3. Update package.json:
{
  "name": "k8s-demo",
  "version": "1.0.0",
  "description": "Simple Node.js application for Kubernetes demo",
  "main": "server.js",
  "scripts": {
    "start": "node server.js"
  },
  "dependencies": {
    "express": "^4.21.2"
  },
  "keywords": [],
  "author": "",
  "license": "ISC"
}
4. Create Dockerfile: Package the app into a container, like sealing your robot in a spaceship.
FROM node:16-alpine
WORKDIR /app
COPY package*.json ./
RUN npm install --production
COPY server.js .
CMD ["node", "server.js"]
5. Test Locally:
node server.js
In another terminal:
curl http://localhost:3000You will see: Hello, Kubernetes! Config: Not configured, Secret: No secret provided
Step 2: Containerize and Share
Now, let’s ship our app to the world (or at least Docker Hub).
1. Build the Docker Image:
docker build -t your-username/your-app-name:latest
2. Test the Container:
docker run -p 3000:3000 your-username/your-app-name:latest
3. Push to Docker Hub:
docker login
docker push your-username/your-app-name:latest
Step 3: Set Up Your Kubernetes Stage
Minikube is our local theater where the app performs.
1. Start Minikube:
minikube start
2. Enable Ingress: This lets us access the app via a friendly URL.
minikube addons enable ingress
3. Verify:
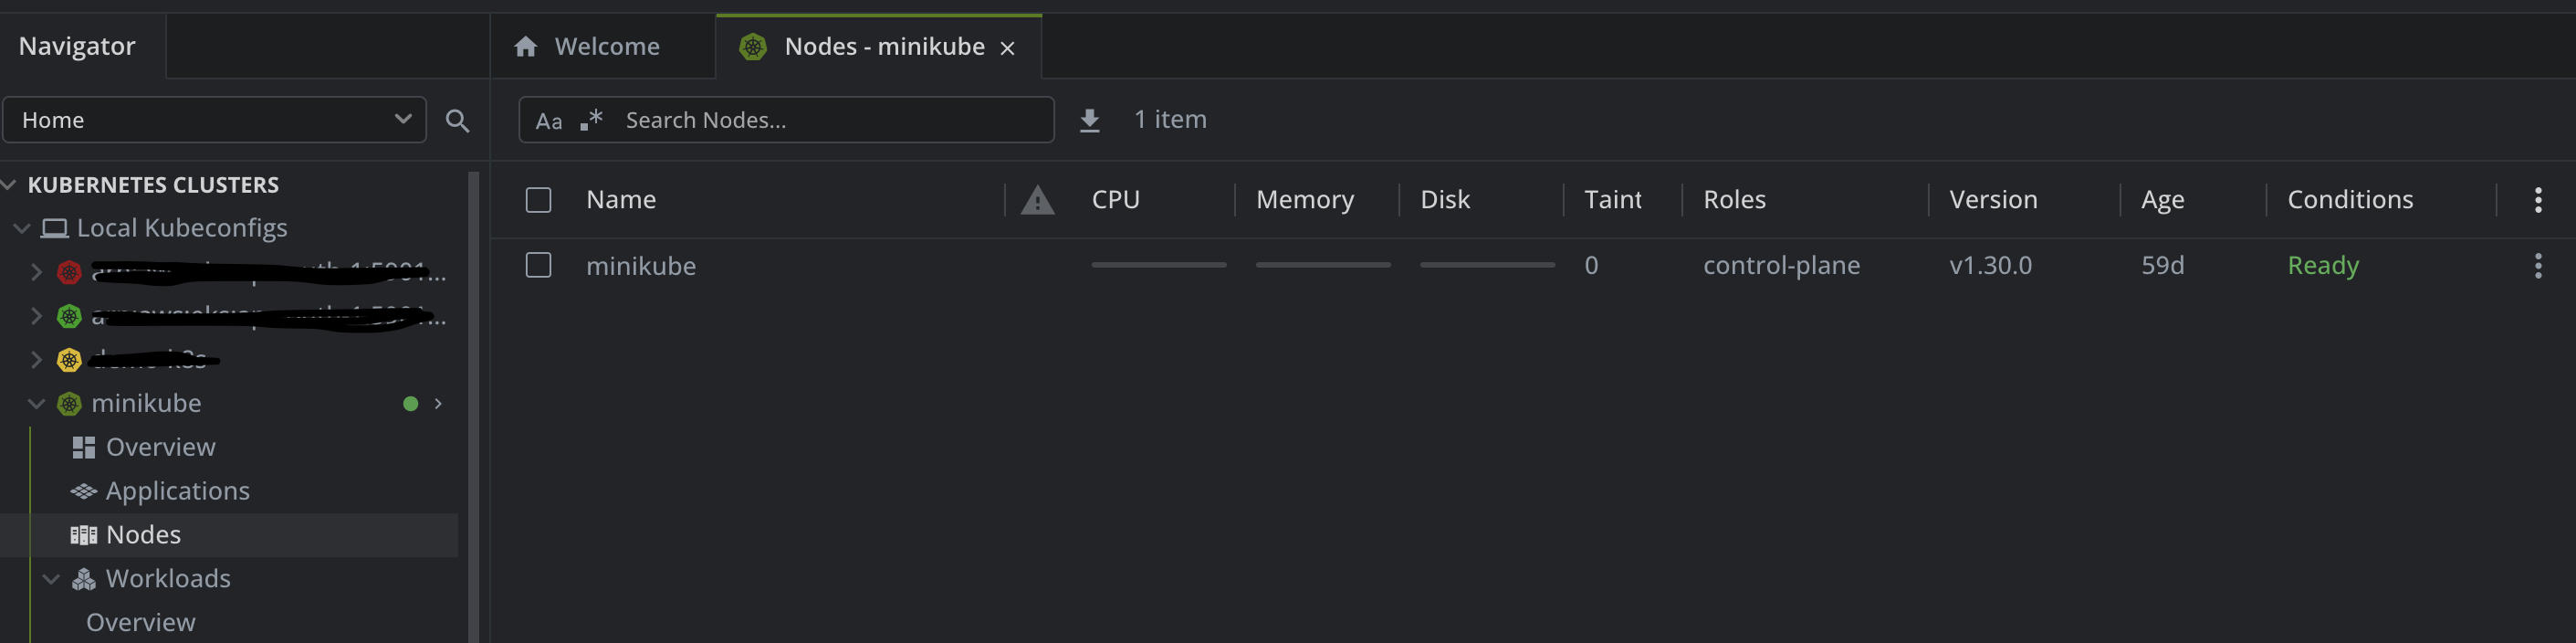
kubectl get nodes
Below screenshot shows node in lens
Step 4: Orchestrate with Kubernetes
Kubernetes uses YAML files as sheet music for our app. Let’s define the players.
1. Create Manifests Directory:
mkdir k8s && cd k8s
2. Deployment (deployment.yaml): Runs two instances of our app, pulls config and secrets, and stores logs.
apiVersion: apps/v1
kind: Deployment
metadata:
  name: web-app
  labels:
    app: web-app
spec:
  replicas: 2
  selector:
    matchLabels:
      app: web-app
  template:
    metadata:
      labels:
        app: web-app
    spec:
      containers:
      - name: web-app
        image: yourimagename
        ports:
        - containerPort: 3000
        env:
        - name: APP_CONFIG
          valueFrom:
            configMapKeyRef:
              name: web-config
              key: app-config
        - name: APP_SECRET
          valueFrom:
            secretKeyRef:
              name: web-secret
              key: app-secret
        volumeMounts:
        - name: logs-volume
          mountPath: /logs
      volumes:
      - name: logs-volume
        persistentVolumeClaim:
claimName: web-app-pvc- Key Concepts:
- Volumes: We use a PersistentVolumeClaim (web-app-pvc) to store logs at /logs, ensuring they persist across container restarts.
- ConfigMaps/Secrets: APP_CONFIG and APP_SECRET inject configuration and sensitive data securely.
3. Service (service.yaml): Routes traffic to our app.
apiVersion: v1
kind: Service
metadata:
  name: web-app-service
spec:
  selector:
    app: web-app
  ports:
  - port: 80
    targetPort: 3000
  type: ClusterIP
Key Concept: Networking—The Service acts like a load balancer, directing requests to our app’s pods.
4. Ingress (ingress.yaml): Makes the app accessible at webapp.local.
apiVersion: networking.k8s.io/v1
kind: Ingress
metadata:
  name: web-app-ingress
  annotations:
    kubernetes.io/ingress.class: nginx
spec:
  rules:
  - host: webapp.local
    http:
      paths:
      - path: /
        pathType: Prefix
        backend:
          service:
            name: web-app-service
            port:
              number: 80
5. Persistent Volume (pv-pvc.yaml): Allocates storage for logs.
apiVersion: v1
kind: PersistentVolume
metadata:
  name: web-app-pv
spec:
  capacity:
    storage: 1Gi
  accessModes:
    - ReadWriteOnce
  persistentVolumeReclaimPolicy: Retain
  hostPath:
    path: /logs
---
apiVersion: v1
kind: PersistentVolumeClaim
metadata:
  name: web-app-pvc
spec:
  storageClassName: ""
  volumeName: web-app-pv
  accessModes:
    - ReadWriteOnce
  resources:
    requests:
      storage: 1Gi
6. ConfigMap and Secret (configmap.yaml, secret.yaml):
apiVersion: v1
kind: ConfigMap
metadata:
  name: web-config
data:
  app-config: "Welcome to my app"
apiVersion: v1
kind: Secret
metadata:
name: web-secret
type: Opaque
data:
app-secret: yoursecret
Step 5: Launch the Performance
Let’s bring the app to life!
1. Apply Manifests:
kubectl apply -f k8s-demo/k8s/
2. Map the URL:
echo "$(minikube ip) webapp.local" | sudo tee -a /etc/hosts
3. Enable Access: In a new terminal:
sudo minikube tunnel
4. See It Live: Open http://webapp.local in a browser. Expect: Hello, Kubernetes! Configuration and secrets loaded successfully.
.png)
Step 6: Peek at the Logs
Check the app’s postcards (logs).
1. Access Logs:
cat /logs/app.logView Pod Logs in Lens
- Open Lens and connect to your Minikube cluster.
- Go to Workloads > Pods.
- Click your app’s pod (e.g.,
web-app-xxx). - Open the Logs tab to see real-time output.
.png)
“Our app’s logs, safely stored thanks to Volumes!”
Step 7: Explore with Lens
Lens is your backstage pass to Kubernetes.
- Pods: Your app’s running instances.
.png)
- Services: Traffic routing.
.png)
- Ingress: URL mapping.
.png)
- ConfigMaps/Secrets: App configuration.
.png)
- PVCs: Log storage.
.png)
We can see overview of workloads here:
.png)
Conclusion
Deploying an application on Kubernetes is no longer just a task for platform teams—it’s becoming foundational knowledge for anyone building modern software. In this guide, you took your first step into that world: starting with a friendly Node.js app, containerizing it, and launching it in a local Kubernetes cluster using Minikube. Along the way, you configured key elements like Services, Ingress, Volumes, ConfigMaps, and Secrets.With Lens, you even got a visual backstage pass to your cluster’s inner workings.
But this wasn’t just a technical checklist — it was a story of how Kubernetes brings infrastructure, configuration, and application logic together into one elegant system. And now, you’ve conducted your first Kubernetes symphony — right from your local machine.
Explore related posts


